

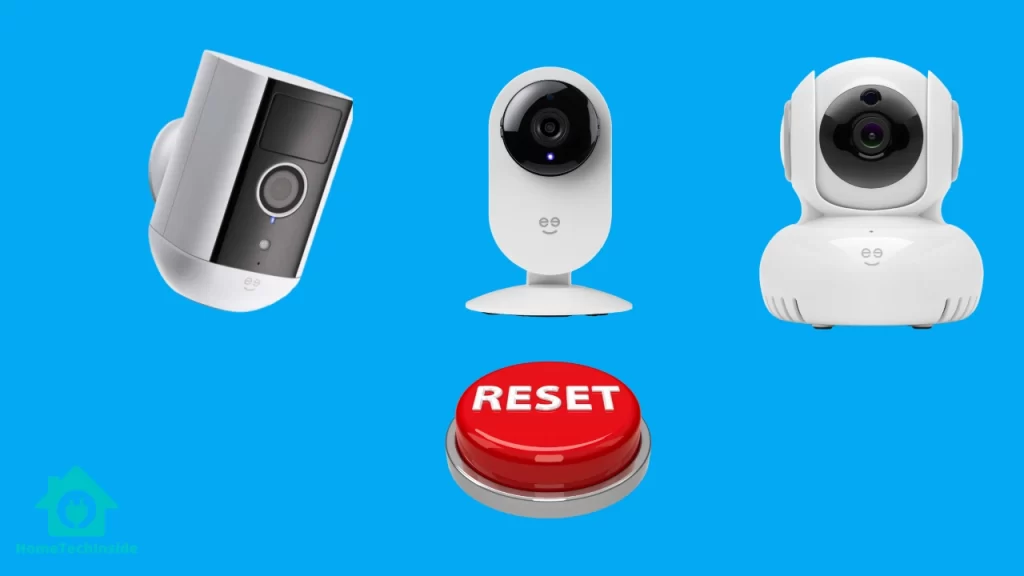
To reset geeni camera, hold down the reset button on the back of the camera for 10-15 seconds and wait until you hear the voice prompt from the camera.
If you having issues with Geeni cameras, resetting it can solve all the technical glitches causing the problems.
This article will guide you through the reset process and highlight the situations when resetting your Geeni smart camera is the right call.
When To Reset Geeni Camera?
Usually, you should reset your Geeni camera when it starts acting up. Here’s the three primary situations when resetting seems to be the last option.
- Your camera is not getting connected to the wifi network: If your Geeni camera is not getting connected to the internet, resetting the camera might solve the problem. Once you reset it, you can set up the geeni smart camera again and connect it to the internet.
- Your camera is unresponsive: Often, when a camera stops responding or working properly, resetting the camera brings it back to the working condition.
- You are selling or giving away your camera: In case, you are selling or giving away your Geeni camera, you must reset the camera to erase all your personal settings and information from it.
Note: Resetting a device erases all saved settings and information from the camera. So, make sure to have a back up important data or settings before resetting the geeni camera.
How Do I Reset My Geeni Camera?
If your camera Geeni camera is acting up, resetting it to the factory settings might bring your camera back to the original condition.
At the same time, a factory reset should be the last resort to fix your Geeni camera problems as it will clear all the saved configurations and App settings including integration with any virtual assistant.
Therefore, you should first power cycle your camera before resetting.
To power cycle your Geeni camera, remove the camera from the power outlet, wait for few minutes and reconnect it back to power source.
If this doesn’t solve your Geeni camera issues, remove the camera from the Geeni App. Here’s how you can do this:
- Open the Geeni app and select the camera.
- Click on the “Settings” icon and choose “Remove Device”.
- Confirm to remove the camera from the APP.
Now, proceed with the below resetting steps:
- Find the reset button, usually placed on the back side of the camera (check the image below in this article to find the exact location).
- Press and hold the reset button for 5-10 seconds.
- Once you hear a voice prompt from the Geeni camera, release the button.
- Now, your camera will reboot and reconnect to the WiFi network.
How Do I Reset My Geeni Camera to a New Wi-Fi Network?
If you want to connect your Geeni camera to a new wifi network, the first thing you need to perform is resetting the camera and then connect it to the wifi network.
Here are the steps you need to follow to reset your Geeni camera to a wifi network:
- Find the reset button on your Geeni camera. (check the image below to find the exact reset button location on different Geeni camera models).
- Press and hold the reset button for 5-10 seconds.
- When the blue light on the front of the camera turns off, release the reset button.
- Now, open the Geeni App on your smartphone and log in to your Geeni account.
- Click on add device “+” icon to add a new device.
- Select your Geeni camera and follow the on screen instructions.
In case, if your Geeni camera is still not connected to the WIFI network, make sure you have entered the correct Wi-Fi password during setup process. If you entered the right password, you should try resetting your wi fi router.
What To Do After Resetting Your Geeni Camera?
Once, youe Geeni camera is reset, you need to reconnect it to the Wifi and restore the camera settings.
Reconnect to Wi-Fi
Here’s how you can reconnect your Geeni camera to the Wi-Fi network:
- Launch the “Geeni app” and select your camera.
- Tap on the “Settings” icon and Choose “Wifi Settings”.
- Choose your Wi-Fi network and enter the correct wifi password.
- Click on Save and your camera will start connecting to the wifi network.
Once, the camera is connected to the WiFi, move to the next step.
Restore Camera Settings
To restore your Geeni camera’s settings, follow the below steps:
- Launch the Geeni app on your smartphone and select your camera.
- Click on “Settings” icon and choose “Camera Settings”.
- Select the settings you want to restore and then adjust it and click on “Save”.
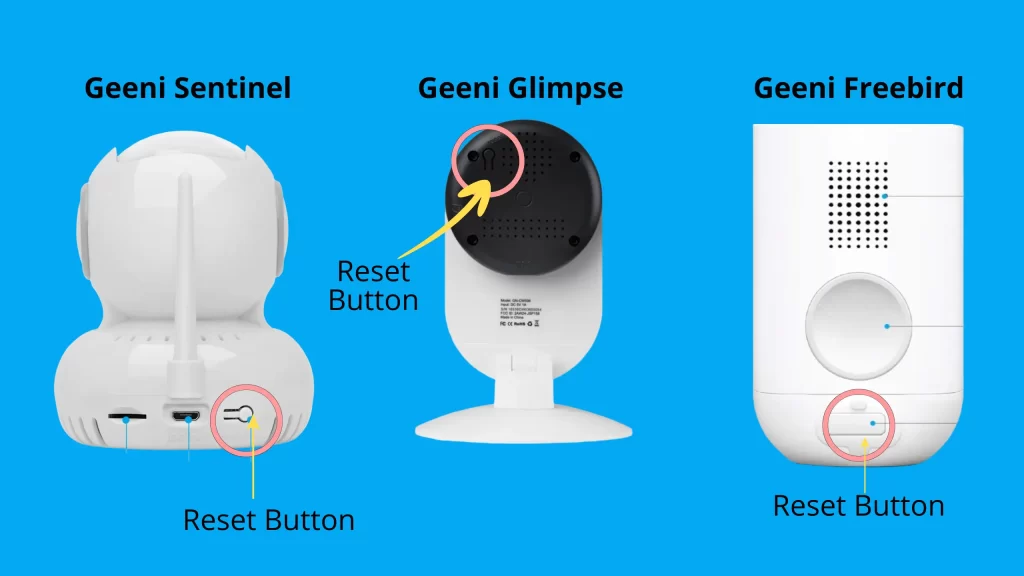
Where is the Reset Button on Geeni Camera?
Geeni has several camera models and each of them have different specifications and design. Therefore, sometimes its hard to find out the exact location of the reset button, the reset button might be hidden beneath the fold.
- Geeni Sentinel (pan and tilt) – The reset button on Geeni Sentinel is located next to the SD card slot on the back of the camera (see the below picture for exact location).
- Geeni Glimpse – On Geeni Glipmse camera, the reset button is placed on the back of the camera (see the below picture for exact location).
- Freebird – The reset button is located below the magnet mount connector on the back side of the camera (check the below image for exact location).
- Geeni Sentry – The reset button is located beneath the cover on the underside of the floodlight camera.
Once you have located the reset button, you can use a pin to press and hold the reset button for 5 to 10 seconds. Your Geeni camera will reset and enter the pairing mode after which you can reconnect it using the Geeni app.
Geeni Camera Won’t Reset – What To Do?
If your Geeni camera won’t reset, follow these steps:
- Check Power Supply: Ensure the camera is adequately powered and make sure the power source and cable are functional.
- Use Correct Reset Method: Locate the reset button (often on camera’s back side) and use the method provided in this article above.
- Confirm Indicator Lights: Check for indicator lights during the reset process and if the LED light is not responding, try the reset process again.
- Reset in Optimal Conditions: Conduct the reset in optimal conditions, a stable Wi-Fi connection and proximity to the router during the process.
- Contact Geeni Support: If the issue persist, reach out to Geeni customer support for further assistance. They can provide guidance specific to your camera model and troubleshooting steps.
How do I reset my Geeni camera to factory settings?
To reset your Geeni camera to factory settings, locate the reset button on the Geeni camera, typically located on the back of the camera or under the cover. Use a reset pin and hold it down for 5 to 10 seconds. The camera will reset, and you can set it up again.
What should I do if my Geeni camera is not pairing?
If your Geeni camera is not pairing, ensure that your camera is in pairing mode. If not, use the reset procedure mentioned earlier. Check Wi-Fi connectivity, verify the Geeni app settings, and make sure the camera is within range of the Wi-Fi signal during pairing.
How to get Geeni camera back online?
To get your Geeni camera back online, confirm the camera is powered on and connected to the Wi-Fi. If your Geeni camera is offline, troubleshoot by checking your internet connection, restarting the camera, and ensuring the Geeni app settings are accurate. If issues persist, consider resetting and re-pairing the camera.
If nothing works, it is always best to refer to the user manual or contact Geeni customer support.
Conclusion
The process of resetting smart devices, such as the Geeni camera, serves as a practical solution when confronted with connectivity or operational issues.
This process ensures a fresh start with the factory-release firmware and configurations, setting the stage for optimal performance.
Remember, after the reset, reconnect your Geeni camera and enhance its capabilities further by updating to the latest firmware—a simple yet effective method to ensure continued satisfaction with your smart device.